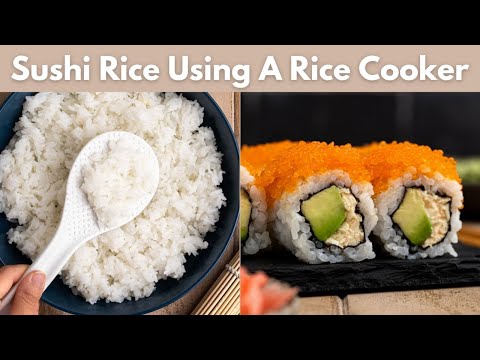
Want to make incredible sushi at home? It all starts with perfectly cooked Japanese rice. In this blog post, I’ll show you how to make vinegared seasoned Sushi Rice with minimal effort, whether you prefer using the stovetop or rice cooker method. With my tips you can create restaurant-quality sushi in no time.

Perfect Sushi Rice Everytime!
After 7 years of sushi-making experience (including 3 years working on my family’s Japanese food truck), I’ve fine-tuned this recipe through lots of practice. Now, my sushi rice comes out perfect everytime. 👌
This rice has a fluffy, shiny texture and a satisfying firm bite. It’s delicately seasoned and sticky enough to make stunning sushi rolls, such as my Tofu Crunch Roll, Cucumber Maki, and Vegan Futomaki Roll.
Want to impress your family and friends with homemade sushi rolls? Let’s get started! 🍣
Why You’ll Love This Recipe
🍚 Perfectly Seasoned. Learn how to season your rice with the perfect mixture of vinegar, sugar and salt that makes your sushi rice taste even better.
🏠 Family Fun. Bond with your loved ones over homemade sushi nights, made possible by mastering this sushi rice recipe.
💰 Budget-friendly. Making sushi at home is much cheaper than ordering takeout at your local Japanese restaurant. Thus, you can cure your sushi cravings without breaking the bank.


(pictured Tofu Crunch Roll & Futomaki Roll)
🌾 Stovetop vs Rice Cooker
Whether using a stovetop or rice cooker both methods yield delicious sushi rice. Your decision depends on availability and preference. Prefer set-it-and-forget-it? Opt for the rice cooker. No rice cooker? The stovetop works just as well. Whichever route you take, flavourful sushi rice is guaranteed!
Remember, each method has its own rice to water ratio but don’t worry – I’ve got you covered with all the details in the recipe card below.
Equipment
6Qt Pot with Lid – I used this pot size to prevent the rice from boiling over while cooking it on the stovetop.
Rice Cooker – Any rice cooker can be used for this recipe. I’m using the Tiger 10 Cup Electric Rice Cooker.
Large Shallow Container – I like using a large 5.6L shallow food storage container to mix the sushi vinegar and rice. You can also use a wooden hangiri, a large baking sheet, or a large dish.
What Type Of Rice Is Used For Sushi?
Japanese short-grain or medium-grain California white rice is used for making sushi. When cooked this variety of rice has a sticky texture, which helps it hold together when making sushi rolls.
The rice vinegar, sugar, and salt used to season the rice when cooked gives sushi its unique flavour.

Ingredient Notes
See the recipe card below for exact amounts.
- Rice – Use Japanese short-grain or medium-grain California white rice. My favourite brands are Kokuho (Rose or Yellow) or Nishiki.
- Rice Vinegar – Adds a tangy, slightly sweet flavour and makes your sushi rice shiny. I used unseasoned rice vinegar. Mizkan and Kikkoman are my go-to brands.
- Sugar – To sweeten the sushi rice and balance out the flavours from the rice vinegar, I used white granulated sugar.
- Salt – This is to season the sushi rice. I used basic iodized table salt.
Step By Step Instructions
Stovetop Method:
- Begin by rinsing the rice in a fine mesh strainer and draining it well.
- Next, combine the rice and water in a large pot (6qt), bring it to a boil, then place a lid on top of it.
- Lower the heat to medium-low to maintain a gentle simmer, and cook for 20 minutes without stirring or opening the lid. (If you notice it boiling over, lift the lid slightly to release the pressure, then carefully place it back on top.)
- Remove the pot from the heat and let it stand covered for 10 minutes.
- Your cooked rice is now ready to be seasoned with the sushi vinegar.
Rice Cooker Method:
1. Add rice to the rice cooker bowl and cover it with water. Rinse 3-4 times, stirring with your hands, until the water becomes less milky. Drain well.

2. Add water to the 3-cup line measure in your rice cooker. If you have any extra water, discard it. Place the rice cooker bowl into the rice cooker and close the lid. Select the rice cook setting or cook according to your rice cooker’s instructions.

3. After cooking, allow the rice to steam for 20 minutes in the rice cooker. Now, it’s ready to be seasoned with the sushi vinegar.

Make The Sushi Vinegar:
Add the rice vinegar, sugar, and salt to a small bowl or measuring cup to make the sushi vinegar. Stir until the sugar has dissolved.
Season The Rice:
Transfer the cooked rice to a large, shallow container (5.6L) and gently break it up using the rice paddle or a wooden spoon. Drizzle the sushi vinegar evenly on top, and using a lifting/cutting motion, mix until well combined. Push the rice to one side of the container, cover it with plastic wrap so that it touches the surface, and let it cool to room temperature before using it in sushi rolls.

👩🏻🍳 Jazz’s Tips
- Use the correct type of rice. Buy short or medium-grain white rice labelled “sushi rice” for best results. I often use medium-grain rice in this recipe.
- Don’t stir or open the lid while the rice cooks on the stovetop. Stirring can activate the starches, forming a crust at the bottom of the pot, which is not what we want.
- Add sushi vinegar to hot rice for better absorption and easier mixing.
🌿 Variations
This sushi rice is already delicious as is, but to take it to the next level, add 1-2 small pieces of kombu (dried kelp) on top of the rice while it’s cooking.
Kombu is a variety of seaweed commonly used in miso soup. It will give your sushi rice an authentic Japanese flavour and aroma. After cooking, you can discard or save the kombu for another recipe.


(pictured Vegan California Roll & Cucumber Maki Roll)
Delicious Ways To Use Sushi Rice
What I love about seasoned sushi rice is its versatility! Here are some fun ways to enjoy it:
- Vegan Sushi Rolls – You can roll sushi rice and fillings like veggies, tofu, or marinated mushrooms in nori seaweed. Here are some sushi recipes that are on my blog:
Spicy Tofu Crunch Roll w/Teriyaki Sauce
Kappa Maki (Cucumber Sushi Roll)
Vegan Futomaki Roll (Maki Sushi)
Vegan California Roll
- Rice Balls – Shape sushi rice into Japanese onigiri and fill them with seasoned tofu, pickled veggies, or avocado for a satisfying snack.
- Sushi Bowls – Build colourful bowls using sushi rice as the base, topped with avocado, cucumber, edamame, and tofu. Feel free to add your favourite sushi fillings to make them even more tasty!
- Side Dish – Enjoy this seasoned sushi rice just like regular cooked rice, perfect for pairing with dishes like my Teriyaki Tofu or Sunomono Japanese Cucumber Salad.
How To Store
To store leftovers: Place the sushi rice in an airtight container and refrigerate for up to 3 days.
To freeze leftovers: Add the sushi rice to an airtight container or ziplock bag and freeze it for up to 2 months. Thaw in the fridge before reheating.
To reheat: Cover the sushi rice with plastic wrap or a damp towel and microwave it in 30-second intervals until warm. Once reheated, it’s ready to be used to make more sushi rolls.
♻️ Reduce Waste: Leftover Sushi Rice Makes Great Sushi!
- Don’t believe the hype – your leftover sushi rice is still perfect for making sushi! As someone who does it all the time, I can assure you that it’s absolutely delicious. Give it a try, and let me know how it goes! 🤩

Frequently Asked Questions
Yes, in the US, medium-grain rice is commonly referred to as sushi rice. Short-grain and medium-grain rice are alike, so you can use them interchangeably.
Look for sushi rice in the international aisle of your regular grocery store or at your local Asian grocery store. I prefer using Kokuho (Rose or Yellow) or Nishiki as my go-to brands.
1. Too much water added. Ensure you follow the recipe card instructions accurately to avoid adding too much water.
2. Avoid stirring the rice while it cooks on the stovetop; stirring can activate the starches, forming a crust at the bottom and/or mushy rice.
3. Let the rice steam or stand. After cooking the rice, it’s important to let it steam or stand for a bit to absorb any excess moisture. Make sure to complete this step!
4. Avoid overmixing the vinegar with the rice. Instead, gently mix the vinegar into the rice using a folding motion.
Preparing sushi rice ahead of time is possible up to two hours before use. To prevent it from drying out, cover it with either saran wrap or a damp towel. Keep it at room temperature on your kitchen counter until you can use it.
The amount of rice in sushi rolls varies depending on size and type. A half sheet of seaweed needs about 2/3 to 3/4 cup of rice and a full sheet requires about 1 to 1 1/2 cups.
✨ MORE VEGAN SUSHI RECIPES
- Spicy Tofu Crunch Roll w/Teriyaki Sauce
- Kappa Maki (Cucumber Sushi Roll)
- Vegan Futomaki Roll (Maki Sushi)
- Vegan California Roll
DID YOU MAKE THIS SUSHI RICE?
I would greatly appreciate your feedback. Kindly leave a comment or star rating ⭐️⭐️⭐️⭐️⭐️ below. Also, feel free to tag me on Instagram, as I enjoy seeing photos of your recipes.

How To Make Sushi Rice (Stovetop or Rice Cooker)
Equipment
- 6Qt Pot with Lid
- Rice Cooker
- (5.6L) Large Shallow Container (or wooden hangiri, large baking sheet, or dish)
Ingredients
Stovetop Method:
- 2 ¼ cups uncooked Japanese white rice (medium or short-grain)
- 2 ¾ cups water
Rice Cooker Method:
- 2 ¼ cups uncooked Japanese white rice (medium or short-grain)
- 2 ¼ cups water
Sushi Vinegar:
- 1/4 cup unseasoned rice vinegar
- 1 tbsp + 3/4 tsp sugar
- 3/4 tsp salt
Instructions
Stovetop Method:
- Begin by rinsing the rice in a fine mesh strainer and draining it well.
- Next, combine the rice and water in a large pot (6qt), bring it to a boil, then place a lid on top of it.
- Lower the heat to medium/low to maintain a gentle simmer, and cook for 20 minutes without stirring or opening the lid. (If you notice it boiling over, lift the lid slightly to release the pressure, then carefully place it back on top.)
- Remove the pot from the heat and let it stand covered for 10 minutes.
- Your cooked rice is now ready to be seasoned with the sushi vinegar.
Rice Cooker Method:
- Please note that 2 1/4 cups of uncooked Japanese rice is equivalent to 3 rice cooker cups. Each rice cooker cup measures 3/4 cup.
- Add sushi rice to the rice cooker bowl and cover it with water. Rinse 3-4 times, stirring with your hands, until the water becomes less milky. Drain well.
- Add water to the 3-cup line measure in your rice cooker. If you have any extra water, discard it. Place the rice cooker bowl into the rice cooker and close the lid. Select the rice cook setting or cook according to your rice cooker's instructions.
- After cooking, allow the rice to steam for 20 minutes in the rice cooker. Now, it's ready to be seasoned with the sushi vinegar.
Make The Sushi Vinegar:
- Add the unseasoned rice vinegar, sugar, and salt to a small bowl or measuring cup to make the sushi vinegar. Stir until the sugar has dissolved.
Season The Rice:
- Transfer the cooked rice to a large, shallow container (5.6L) and gently break it up using the rice paddle or a wooden spoon.
- Drizzle the sushi vinegar evenly on top, and using a lifting/cutting motion, mix until well combined.
- Push the rice to one side of the container, cover it with plastic wrap so that it touches the surface, and let it cool to room temperature before using it in sushi rolls.
- This recipe yields 6 cups of cooked sushi rice, making approximately 4-5 full nori sheets and 8-10 half nori sheets of sushi rolls.
Video
Notes
- Use the correct type of rice. Buy short or medium-grain white rice labelled “sushi rice” for best results. I often use medium-grain rice in this recipe.
- Don’t stir or open the lid while the rice cooks on the stovetop. Stirring can activate the starches, resulting in a crust forming at the bottom of the pot, which is not what we want. Keep the lid closed to ensure perfect sushi rice every time.
- Let the rice steam or stand. After cooking the rice, it’s important to let it steam or stand for a bit to absorb any excess moisture. Make sure to complete this step!
- Add sushi vinegar to hot rice for better absorption and easier mixing.
- To store leftovers. Place the sushi rice in an airtight container and refrigerate for up to 3 days.


Wow I was so shocked when I opened the top! It came out amazing! I also used a cooking town in between the pot and lid and it worked beautiful! Best sticky rice stove top recipe!!